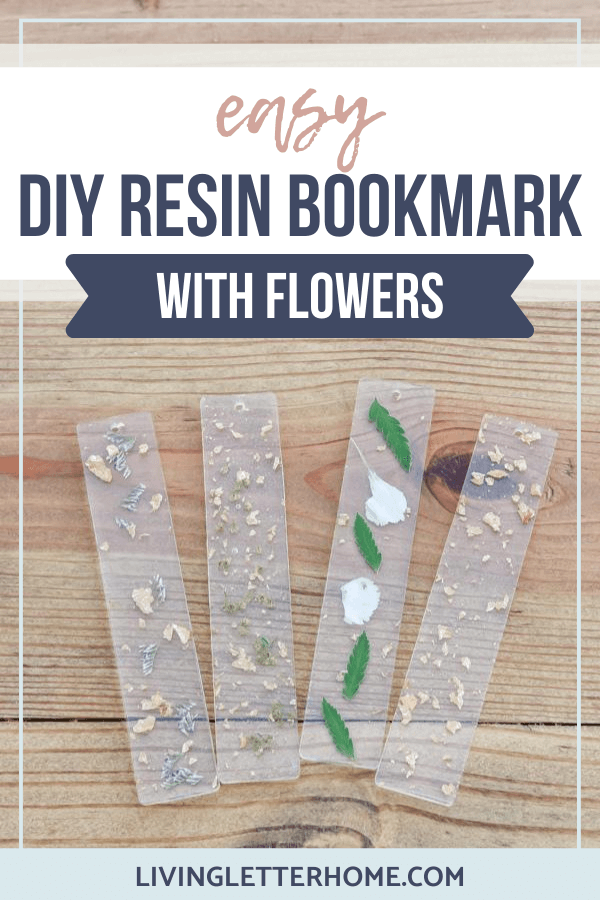
DIY Resin Bookmarks
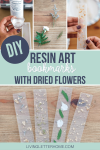

Even if you’re new to resin crafts, these DIY resin bookmarks with dried flowers are a great beginner resin project you can do in an afternoon and is even great for little ones!
I’ve been wanting to get back on the horse of this blogging thing, but not only has there been no motivation, there really hasn’t been any time.
But we actually are getting ready to start a project this coming weekend that I’m SO excited about that’s been a long time coming and I can’t wait to see how our vision is going to come to life.
Make sure you’re on my email list so that you don’t miss out on that sneak peak. I promise I’m like the least annoying person in your inbox ever and will only email you with fun (or real funny) things.

I had some incredible friends that sent us beautiful flowers after we found out we lost our sweet boy and I wanted to do something to preserve them.
I thought about pressing them or framing them with our last ultrasound we had of him, but to be quite honest, I wasn’t ready to have that visible just yet.

Because these flowers came in this amazing little box, I decided that I would make that the memory box to put all my pregnancy tests, hospital bracelets and then the way I decided to preserve these flowers – to use a bookmark mold and take my first rodeo at an easy resin craft idea.
If you’re wanting to make some bookmarks of your own, here’s how you can do it.
DIY Resin Bookmarks

This post may contain affiliate links which help me pay for things like web hosting, site security, email services and bottles of wine from Aldi when the aforementioned things aren’t working. They cost nothing for you, but help me continue to provide free content to you fine, beautiful people!
- Bookmark silicone molds
- Epoxy resin
- Flowers
- Optional: Any other things you may want to add (tint, gilded foil flakes, glitter, sequins, buttons, etc)
- Optional: Tassles

Now I should note that the last time I tried a “should be super simple” art project DIY craft, I ended up with probably the worst DIY fail I’ve ever had. Funny? Of course. Successful art project? Hardly.
So, I was very nervous as this was kind of a high stakes project for me. I didn’t want to mess this up because I wanted to keep these forever.
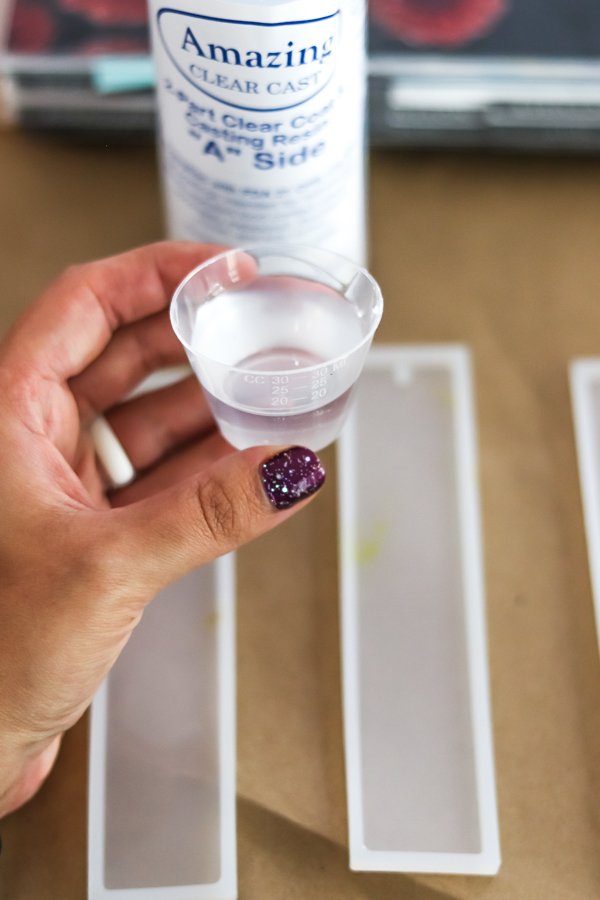
When working with resin, make sure that you follow the directions exactly on this so that you have the right ratios and are aware of the time you have to work with this stuff.
With the resin I used, it was a 1:1 ratio and you have about 40 minutes to work with the resin before you can’t move it around anymore. It’s not fully cured until 18-24 hours, but you just want to be quick. Which shouldn’t be hard since we’re working with teency lil’ bookmarks here.

I’m assuming most resin works the same, but there is an A part and a B part. After measuring, pour both parts into a cup.

Mix the two parts throughly with a popsicle stick. This is a project where you’ll want to use reusable stuff because using things you’ll be eating or drinking out of after using resin just seems….well, on brand for 2020, but just not good for daily health.
If you decide to use things like gilded gold flakes, glitter, tint, or any other mix ins, this is where you’d want to use those as well. Don’t add in your flowers at this point.
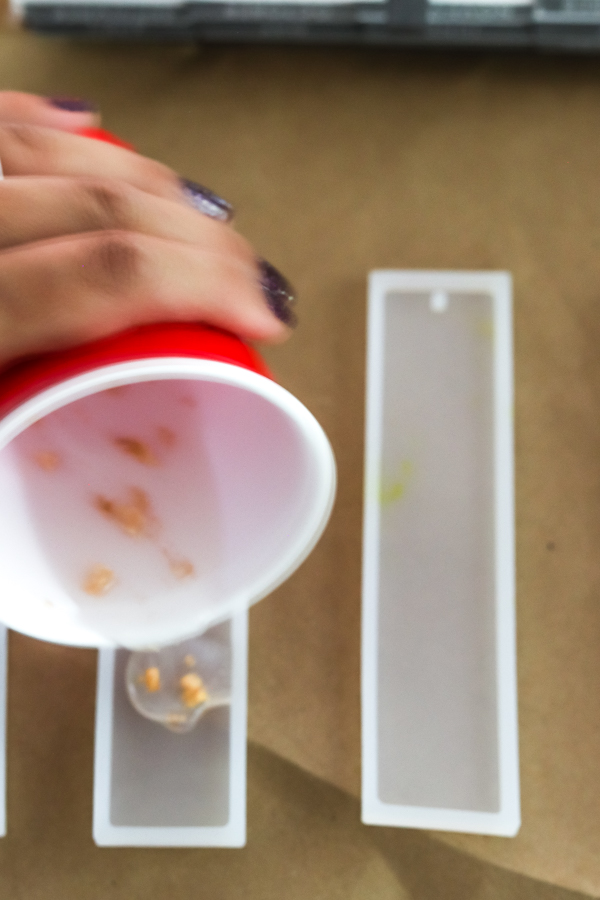
Pour your resin into the molds.


Using scissors, snip your flowers into teeny, tiny parts. If you have small flowers like baby breath or something, these are perfect size. If you have larger flowers or larger greenery that you want to use, you need to make sure it’s small enough to be completely submerged into your resin.
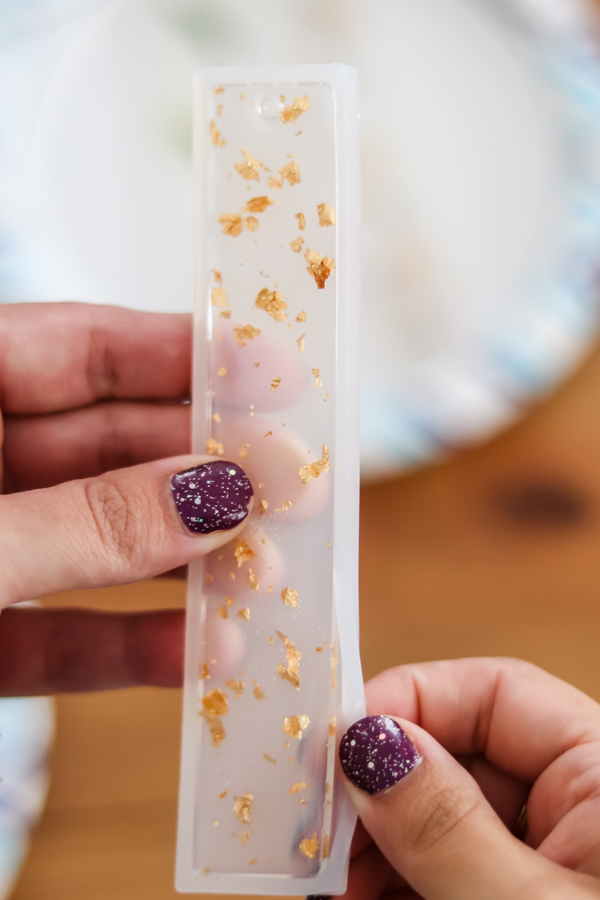
I used an old pair of tweezers to basically press it down into the resin.

Set them somewhere to dry. I put mine on paper plates so I could easily move them cuz we got a buncha Grabby Gabys over here who would have their grubby lil’ hands all up in these book marks which may make for some great resin casting of their fingerprints or whatever, but that’s not the look I was going for here.

I made these in the afternoon and let them sit a full 24 hours. I could have taken them out in the morning, but quite honestly, I had to wait until the next afternoon when babes were napping so I could photograph. Bloggin’ probs.

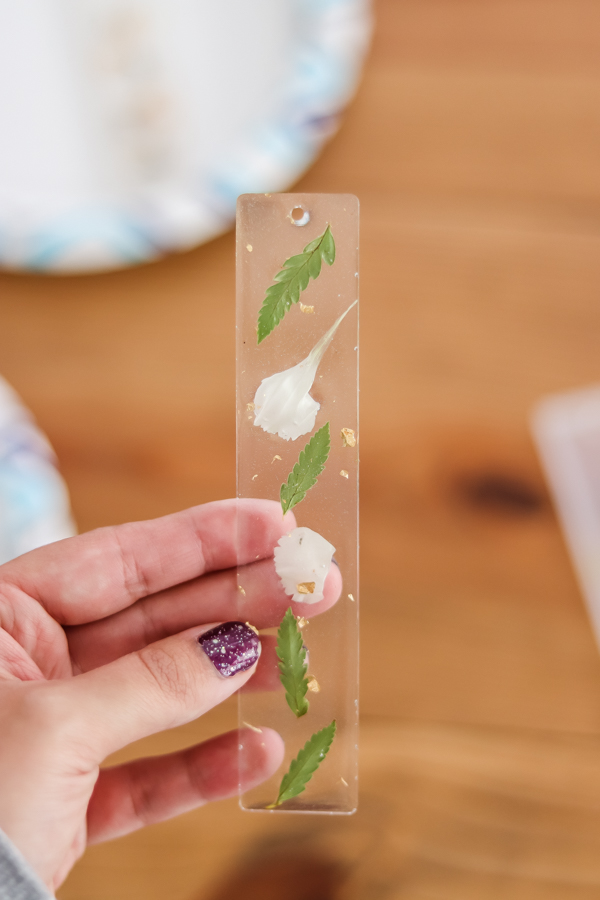
Remove your bookmarks from the mold and voila – beautiful resin art that you can have with your preserved flowers in them to remind you of your special event. Whether it’s something happy like a wedding or anniversary or even something more somber like a pregnancy loss or another loss.
Part of me wanted to add tint to make this colorful resin, but being a newbie over here, I wasn’t willing to risk it this go around. Maybe next time.

If you want, this is where you could add a tassel to yours which you can get from a myriad of places, but I wanted simple for these since they were going to be added to a memory box.
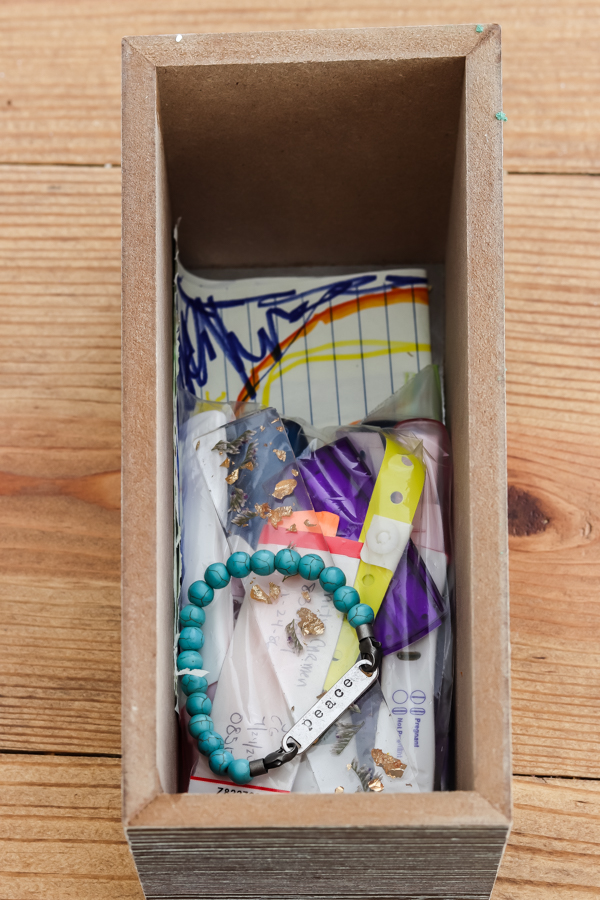
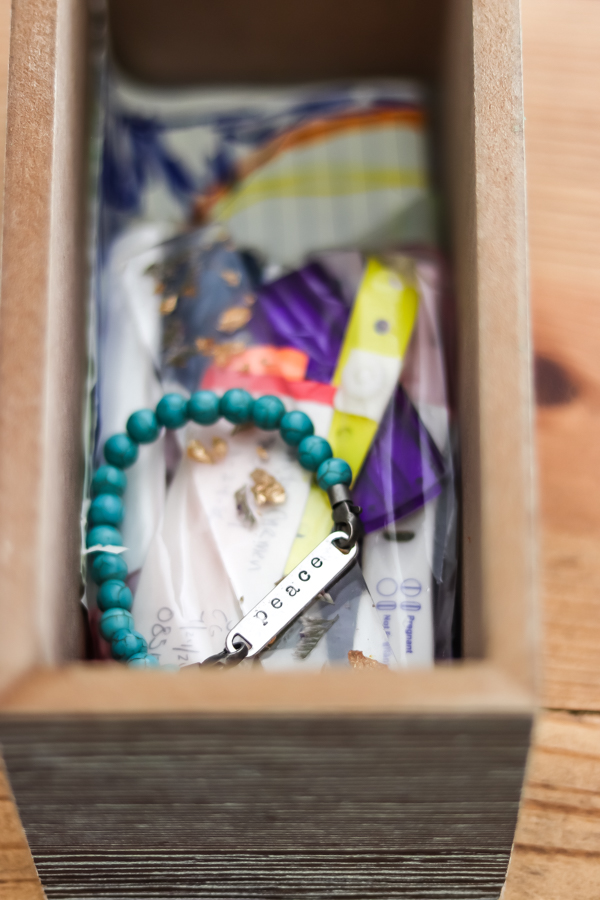
In this box I stored all my positive pregnancy tests, some sweet notes, a bracelet from one of my best friends, one of my DIY resin bookmarks and you can see sneaking out on the bottom a picture of a rainbow that Charlotte drew to make me feel better which of course made me cry with all the happy tear feels.
I’ve got this box tucked away up in a closet because for now, it’s just really painful to look at, but I know one day I’ll be glad I have it to look back on one day and I know you will too if you make one of these for yourself.