DIY Wood Curtain Rods (West Elm Inspired)
West Elm style inspired wood curtain rods that can save you lots of money and still provide a modern, unique style at less than half the cost of the original rods from West Elm.
Ah, West Elm. I love them so much.
I just don’t always love their prices. Which is why I am STOKED to be writing this post today.
We decided to make wood curtain rods during a snow day so it was off the cuff, one of the easiest DIY projects we’ve done so far (well, kinda) and didn’t take long at all! AND saved us about $50.
If you follow us on Instagram, you might have seen that we were considering taking down our plantation shutters in our house. If you guys do not follow us on Instagram, what are you waiting for?! Just kidding.
All the windows that are in the front of our house had plantation shutters.
Let me take a TV time out to talk about this for a second. We actually really liked the plantation shutters. They are also very expensive so the thought of us taking them down just made our wallets shudder.
So, why did we want to take them down for $10 Ikea curtain panels and a $17 mid century curtain rod?
Because money doesn’t create the feel you’re going for in your house.
If you don’t have $3000 to put in new floors in your entire house, then don’t. (But if you can score hardwood floors for 33 cents a square foot, DO IT!)
If you move into a house that has really expensive window treatments and they’re not your style, CHANGE THEM. It’s your house!
*jump* (<– That was me, jumping off my soapbox.)
Now, on to the fun stuff! I want to show you how to make these knockoff West Elm curtain rods for yourself! The measurements here will be for one curtain rod for a 32″ window. Let’s do it!
How to create a DIY mid century curtain rod:
Some affiliate links may be used for your convenience. With no additional cost to you, affiliate links allow me to pay for things like web hosting, site security, email service, and bottles of wine from Aldi when any of the aforementioned things aren’t working for me.
- (1) 2″ dowel rod
- (1) 1 1/4″ dowel rod
- (2) Galvanized ceiling plate.
- (2) 1″ Galvanized split ring tubing hanger.
- (1) 3/8″ allthread bolt.
- (1) 1/4″ allthread bolt
- (1) 1/4″ Tee Nut
- (4) 1/4″ copper coupling with stop.
- Matte black spray paint
- Wood glue
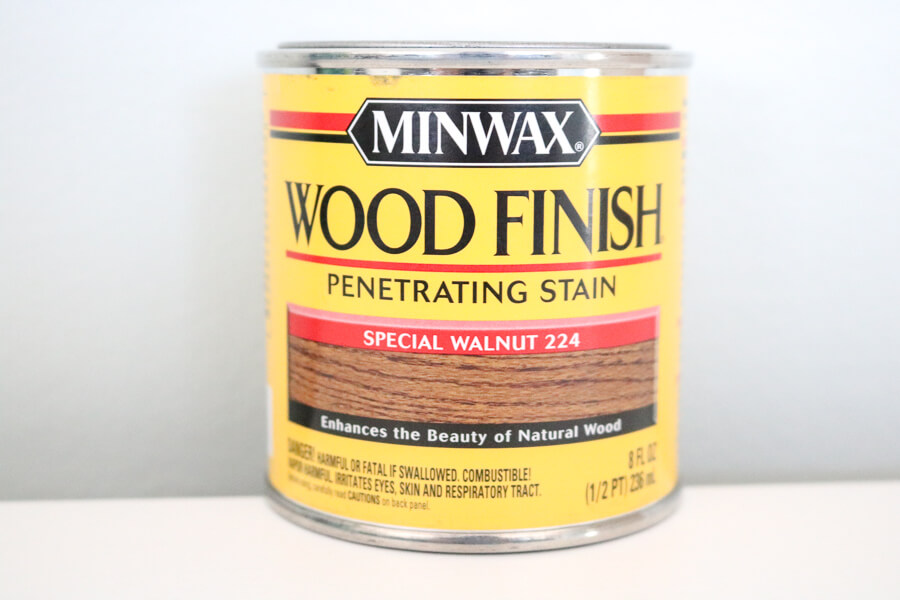
- Stain in color of your choice. We chose Special Walnut because … regular walnuts just won’t cut it.
- [Optional]: Craft wood dowels
(PS. The reason I try to link all the products we use is so that if hardware stores make you panic because you’re afraid of getting hassled or you don’t feel like trying to go find where everything is, hopefully by clicking the specific item, you can look and see exactly where they will be in your Lowes or Home Depot!)
- Gather your supplies.
Do I really have to put this as step one? Internet seems to think I have to.

- Measure your window.
For reference, our ceilings are 8 feet. Our windows are 32 inches wide. If you need long rods, your measurements will vary, but our measurements are pretty standard for a lot of windows.
We wanted our curtain rod to be as high as it could go so we measured so that the base of the wall plate would be right at the base of where our crown moulding will (hopefully someday VERY SOON plz Jesus) be. - Make your finials.
Your 2″ dowel rod will be the finials. We made ours 3″ long.
Cut them to size with your saw.
Ya know, sometimes you don’t get pictures of steps with power tools because your toddler needs a “thnack” every five seconds (which is toddler for “snack”, obvi. Dang it, I’ll feed her forever if she keeps on being this cute.)
- Math. Uh oh.
Now look. I’m going to throw some math at you but hopefully this won’t make you run for the hills and let an invisible fire burn you up.
“Please don’t let the invisible fire burn my friend” – Cal Naughton Jr. / me.
It’s easy.
Width of window + width of window trim you may have on either side + amount of overhang you want = length of your 1 1/4″ dowel rod.
For example, this is how it worked out for us: 32 (width of our window) + 7 (3.5″ window casing on either side of our windows) + 9 (4.5″ overhang on each side) = 48. - Cut 1 1/4″ wooden dowel.
Using your saw, cut your 1 1/4″ dowel to the number that you got in the aforementioned step. Again, for us, this was 48. We actually ended up trimming of a bit of the end to ensure the cut was super flat and ours went from 48 to 47 3/4″. No biggie.
- Stain.
Just as a reminder, we chose Minwax Special Walnut.
- Actually use the stain now.
Now that all your pieces are cut, it’s time to stain! You probably want to do this in a well ventilated area. Or, if you’re super professional like us, you can just do this on the end of your kitchen counter. It’s cool.

- Let your stain dry.
This sounds like a poop in your pants thing, but I’m talking about the curtain rods. Let the stain on your wooden dowels.

- Assemble your metal things to create your curtain rod brackets.
While your stain is drying, you’ll want to assemble all those weird metal parts we told you to buy like this:

- Giggle to yourself.
I laughed when I saw this because it looks like the shrug emoji which I use v. often in real life. This is the ceiling flange on bottom, the 3/8 bolt cut down to a couple inches with 2 of those copper couplings covering it and then the
shrug emoji armssplit ring hanger. - Spray Paint.
After you’ve assembled 2 of these guys, spray paint them with our absolute favorite, use it on everything, matte black spray paint.
- Attach finials to dowel rods.
Once your stain has dried, it’s time to get to work. You take creative liberty here, Picasso, but for us, we glued one finial on and then made the other side removable so our curtains could be taken down and washed. Our daughter (and her father) really like Cheetos and these are white curtains.
- Optional step: Glue if necessary.
If there will be a side you’ll be gluing: To help hold the glue while it’s drying, drill a hole as close to the center as possible of both your finial and your curtain rod. You can eyeball this. We did. Break off a little piece of (
that Kit Kat Bar) a teeny dowel rod and place it in to your curtain rod dowel. We did add a dab of hot glue in the hole before putting the little dowel in there. - More gluing.
Add wood glue around the base of the dowel and then push on your finial end. Allow this to dry for a couple hours before messing with it.
- Drill and add tee nut.
For the other side that needs to be removable, you’ll drill a 1/4″ hole in your finial end and hammer in the tee nut.

- Add your bolt.
For the curtain rod side, you’ll cut a piece off that bolt, drill a 1/4″ hole, then put a dab of hot glue and put in your bolt.
 If you’re wondering why I have no photos of us cutting the bolt, it’s because we used a tool we probably shouldn’t have and it sparked a lot and I thought he was going to set himself on fire, so I chose to act like it didn’t happen cuz PICS OR IT DIDN’T HAPPEN, right?
 - Drill bracket into the wall.
Measure and hang up your now sprayed bracket that will hold your curtain rod. We drilled these into studs that were on either side of the window which just worked out swimmingly.

- Hang your curtains
Add your curtains to the rod and then hang!

Depending on what kind of curtains you have, you could also use curtain rings with clips on them if you wanted to, but I personally wouldn’t use grommet top curtains.
The back side of these Ikea curtains have a place where you can slide the rod through, which is what we did.
I am SO happy with how these turned DIY curtain rods turned out! 


Curious to know how much this curtain rod idea cost us?
$17 + tax.
I have seen a lot of cheap curtain rods in my day – a lot of DIY ideas for things like galvanized pipe curtain rods, copper pipe rods, PVC pipe, the whole 9.
We didn’t feel that any of those fit in the vibe of our current home decor or our transitional style. So I’m so happy that the husband came up with the great idea of using dowel rods! We love this idea!
If you’re still reading this, go ahead and get yourself a little treat. You worked hard out there today, buddy.

Love these West Elm Curtain Rods? Check out these other related posts you might be interested in:
[one-third-first] [/one-third-first]
[one-third] [/one-third]
[one-third] [/one-third]


Oh Carmen, these look absolutely amazing! Like, I like yours WAY more than the original! As if I don’t have enough little projects on my plate, I’m not going to have to add this one to it. 🤣
Aw, yay! Thank you so much!
Just curious, why would you not use grommet curtains for this?
Personal preference; we don’t like grommet top curtains here! Nothing wrong if you do, but we just don’t like them 🙂
These are lovely!
You could use dowel screws to eliminate the bolt-cutting step!
Thank you for the idea, I just bought all the stuff to make it . Wish me luck 😁
yahoo!!! Good luck!
How does a 1 1/4 in dowel fit in a 1 in split ring?
I made these and absolutely love them! Thank you so much for the tutorial! We used slightly different sized dowels for a more understated look in our bedroom (1 1/4 inch ends and 3/4) inch main rod, but the 1/4 inch threaded rod and nut you suggested still fit perfectly! We purchased some curtain rod holders instead of making them but overall the project still was cheaper than 20 bucks for two! Absolutely love them. Would love to share a picture if you were interested :).
Thanks again
Yes always! I’d love to see!!
These are fantastic! Just what I’m looking for. Do you have a recommendation for a center support for wider windows? I can follow directions but lack creativity. Thank you 🙂
Great question – so honestly it would depend on your window size, but I would think instead of doing the one brace in the middle like ours, you might be able to do 2? It would depend on how your window is laid out as well! Big windows are SO hard 🙁
your tutorial is better than Bob Vila’s, thank you.
How do you suggest cutting down the 3/8″ bolt?
Ha! Don’t know about that but THANK YOU!!! And regarding cutting the bolt, we did it with an oscillating tool but it was…. veryyyyy sparky. I’m not sure if that’s the way Bob would have done it, but we used what we had
You can also use a hack saw to cut through metal by hand. Takes an extra minute but with a rod this size it’s still very quick and doesn’t mess up the ends!
You can also order precut threaded bolts online! I was too scared to attempt with any kind of saw.
What kind of screw did you use for the ceiling plates/flanges?
We just used something that we had on hand, I honestly don’t remember! I’m so sorry!
Just bought a fixer($335 grand fixer!) and needed this post! Thanks so much! Right up my ally!
Ooooh yay!! Looove a good fixer 🙂
First of all, your writing is just so refreshing, loved every bit of it. 🙂
And the result – superb! My wife and I just moved into a new house and there’s a lot to do to make it our own, so your idea definitely will come in handy.
Thanks so much for sharing and keep at it! 🙂
okay seriously this made my DAY!!! that means so much to me that you like the project, but also my writing style!! Thank you, thank you, thank you!
Thank you so much for this idea. My husband and I even took your plans one step further and made holdbacks that look just like mini me’s of curtain rod and brackets! I’m so excited to put them up!
Ah!!! I love that idea! It’s brilliant! HOORAY! 🙂
Great job! Can we see the holdbacks? 🙂
Thank you! We actually didn’t add any hold backs, but you totally could if you wanted to!
I love this bc
1: They look freaking awesome.
2: You quoted Taledega Nights.
???? Great job, Carmen!
hahahah yay I am SO GLAD you appreciate my quotes. Sometimes it’s lonely out here
These are great! I used plastic PVC pipe and spray painted the pipe oil rubbed bronze, then misted it with a little vintage copper. It’s not as pretty as the wood (which I used in my living room), but was great for my home office. Thank you so much for this idea. Curtain rods were going to break the bank! 🙂
YES! I’m SO GLAD! I guess people know that curtains rods are a necessary evil so they can charge out the ying yang for them so I was pumped to make these for so cheap and even MORE pumped that you were able to make these for your own home! HOORAY!
I love a great diy and this post is awesome! Very excited to make these for my younger son’s room so I went out and bought the supplies. Much to my surprise I was able to cut my 3/8″ bolt pretty easily….minus the sparks;)…this got me super pumped because I thought this would be my biggest challenge….however I have run into a snag. Could you please tell me how you were able to get your 1/4″ couplings on your bolt?? Seems easy enough but dang I can’t get them to go but so far. It’s almost like the tiny crimping in the center of the coupling is holding it up. What am I doing wrong? Any tips would be greatly appreciated. Thanks so much!!
Hey Sherry! The only thing I can think of is that I have 1/4″ listed to fit over 3/8″ bolt which in theory doesn’t make sense since they should be the same size?? I know for SURE the all thread we used that connects the bracket to the wall plate is 3/8″. So, the only thing I can think is to bump up your coupling to 3/8″. I’m sorry!! It’s been 2 years and my memory is fuzzy at this point, eek! I hope this helps!!!
I was just about to order wooden brackets off of Etsy for $30 bucks a pop, JUSt the brackets, when I found this on Pinterest. I think this is what I”m going to do instead. 🙂 I LOVE the look. One question though – you stained the wooden dowel but you did not put a final poly coat on it. I’m not super versed in staining wood – why wouldn’t the curtain rod not need a protective top coat? Can I really skip this step? Please please tell me yes 🙂
ha! girl! YES!! and we have built numerous wood projects and stained them and definitely poly-ed (is that a word??) but for this, no need! Just stain here! I mean it would never hurt but lemme tell ya it’s been welll over a year and ain’t a thang wrong with ours!
Thank you for posting this. I love how your curtain rod turned out and they look much better than the one from West Elm.
Wow, what a compliment! Thanks!
All information are helpful and very interesting! Thanks for sharing, keep posting! Btw, here’s also the curtain cleaning, btw you can also visit our website https://www.cottoncare.com.sg offering services in affordable prices. Keep it up!! God bless!
Love this! Planning on making this, but had a question before starting. You use a 1 1/4″ dowel, but a 1″ split ring. Does the 1 1/4″ dowel fit in the smaller ring? Thanks!
Okay this is straight out of the mouth of my husband because I didn’t make this and per usual this was his brain child haha – “So 1” split ring is for 1” INNER diameter pipe. Dowel is 1.25” OUTER diameter if that makes sense. So 1” pipe (that the hanger is for) is 1” inner diameter which means the outer diameter is actually bigger.” I hope that helps!!
It’s nice to read a wonderful work like this, keep posting!! Everyone will surely appreciate and love all your next works. If you want to know more about dry clean curtains this website is also the best for you. We also offering services in affordable price. Thank you , Godbless and more power!!
Can across this post and will definitely use it. Very cute and clever. Love the Southern charm in the writing of this post.
Thank you so much! Glad it’s so helpful!
These look amazing. Wonder if I could do them on my own before hubby gets home?
Hahah probably!!! Depends on how long you got!
Great idea! Clean and neat, works good with so many styles!
Yes!! Thank you SO much! Glad you liked them
Wow, these look fantastic! I love them and need them in my life. Pinned for future reference & Sharing! Thank you for sharing on Merry Monday! Hope to see ya next week!
Kim
Kim, oh my GOSH! Thank you SO MUCH for saying that! That means so much to me 🙂 So glad to get to play along with your Merry Monday!