Flip House Reveal
You won’t believe it’s the same house! We breathed new life into this sweet little bungalow so come check it out!

Flip House:
Final Reveal Walkthrough + Video Tour
YOU GUYS.
WE FRIGGIN’ FINISHED IT.
I swear there were times I thought this house was going to get the best of us, but by golly we did it. I’m going to try to “talk” at you as little as possible to show you photos, but there will be things that I for sure want to point out that are super important.
Sexy things, ya heard?
If you’ve missed any of our other posts about this project, you can catch up on those here:


Exterior

BEFORE 
AFTER
New roof, new white board and batten siding, removed a door on the left, added a little side porch, painted the foundation white and the porch black, and added cedar wrapped columns.
Whew.
I mean, you guys. I’m not just saying this because it’s our project, but Beverly had a serious glow up.

I can’t believe that the siding is vinyl. We almost decided against this because true board and batten siding is outrageous and especially now with the cost of wood, forget it.
Then we found out that they had vinyl board and batten and that it was in our budget (ha…I mean what even is a budget in a flip house, right?) and we went for it and I’m so glad we did.
Once we made the decision to pull the trigger on the siding, then we found out they may not be able to get enough in the time in which we needed it, but the skies opened and we got it!
Interior
Living Room
Before:

During:

After:

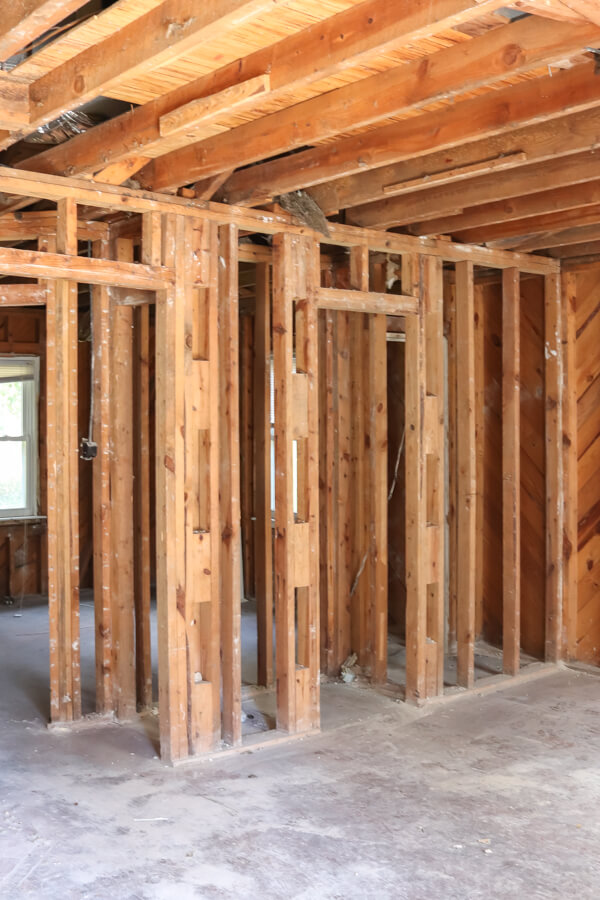
When I gave you guys the first look at Beverly, she was down to the studs. After getting drywall up, I felt a little bit better.
But this view right here?
Chefs. Kiss.

Oh, and THIS view? EXTRA chef’s kiss.

Sitting in one of those black chairs, this would be your view to the front door. I love that we chose to paint all the interior doors.
We actually painted all the interior doors in our own home and I’m still not mad about it either!
Dining Nook
Before & During:

BEFORE 
DURING
After:

Are you kidding me??? I’m really not just saying this because it’s ours, but we tried really hard to leave nothing undone, no stone unturned, no detail left behind.
It’s hard to imagine that this house is only 1100 square feet, but you’ve got a table that seats 4, even 6 comfortably right there in a nook that’s not even technically a formal dining space.
Kitchen
Before:

During:

After:

I’m not saying I don’t love every other part of the house, but this part by far outweighs them all.
I mostly love that this space proves your kitchen doesn’t have to be huge to be both beautiful and functional.

3 barstools in addition to the seating in the dining nook and this is a kitchen a family can enjoy or even a single person who just loves to entertain can enjoy. There’s a great flow to this space that doesn’t feel cramped, but instead feels like a breath of fresh air.

Can we talk about that backsplash for a minute?
I’m so tired of seeing a standard mosaic tile or a regular old subway tile in a kitchen in an investment property.

This tile has depth, texture, and what’s that you see on the wall?

Oh, a pot filler of course! I’m here to tell ya, not much makes you feel richer than a pot filler and by golly, we wanted whoever gets to love this house feel like a million bucks.


Speaking of a million bucks, how about this SHOW STOPPER of a farmhouse sink?
We worked with Sinkology when we redid our laundry room which was beautiful, but we have been eyeing this matte black farmhouse sink for a hot minute and were waiting for a chance to use one. Getting to work together with them again was totally worth it.
If you’re on the fence, I would say to go for it with a Sinkology sink because our cabinet guy said he hates farmhouse sinks and he said the installation of this matte black one was by far the easiest sink he’s ever worked with.
SCORE!
Laundry/Mudroom
Before:

During:
After:


We added open shelving like we have in our own laundry room and placed sconces above for some extra lighting aside from the ceiling light.
Guest Bedroom
Before:
During:

After:

One of my favorite things about the entire house is that we were able to salvage most of the original doors and reuse them.

Painting them and adding our favorite Kwikset handles added the most perfect, sleek modern touch with a sweet bit of history.
Hallway
Before:

During:

After:

Small, but mighty. Something never been used to describe me. HEY O!
I just love this hallway, though, because it’s just enough to add a little console table or some cute styled shelves to add a cozy space between the bedrooms.
Guest Bathroom
Before:

During:

After:


I shared the big ol’ reveal of both bathrooms in this post here, but it stands to be seen again.
It’s just so pretty.
*dramatically wipes tear*
Primary Bedroom
Before:

During:

After:

Walking in you’ve got a large piece of statement art and a view of those GORGEOUS LVP floors. I seriously can’t believe they’re LVP, though.
They look JUST like our engineered hardwood floors that we have in our house.

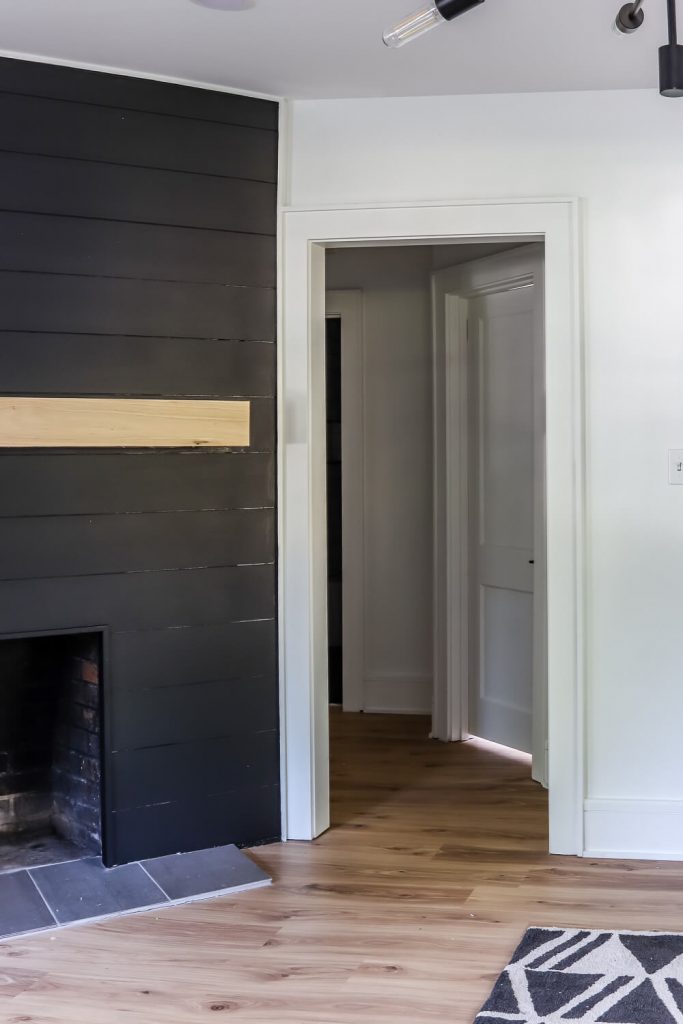
A black modern barn door separates the entrance from the bedroom to the luxurious primary bathroom.

I love how the black shiplap wall turned out. I just imagine this with a rattan or cane headboard and it’s got me all weepy.
I hope the new owners like us enough to let us come back once they’ve got it all decorated it in their own style.

I had a really cute snoozy sidekick while I was taking photos for this. And I loved the idea of being able to look back as we (potentially) stage other homes with the same furniture and see how she grows.
Primary Bathroom
There really is no before with this because this was only a 2 bedroom 1 bathroom house.
During:

After:


Again, I’ve already shared many of the details of the bathroom in this post here, but I gotta say, the more I look at this the more luxurious it feels.

I love the beveled, imperfect design of these tiles. They’re stunning.

We went with a whitewashed wood vanity that matches the single vanity in the guest bathroom and it’s SO pretty in person. And for the price, we were FLOORED at how great of quality it is.
I’m not sure when the last time you priced a vanity, but they’re not cheap.

On either side of the mirror we chose to install wall sconces in addition to the can lights so the homeowner can choose to have overhead lighting or softer lighting during darker times of the day or night.
And look at those cutie little Kwikset handles sticking out looking all modern and cute! MEEP!
Primary Closet
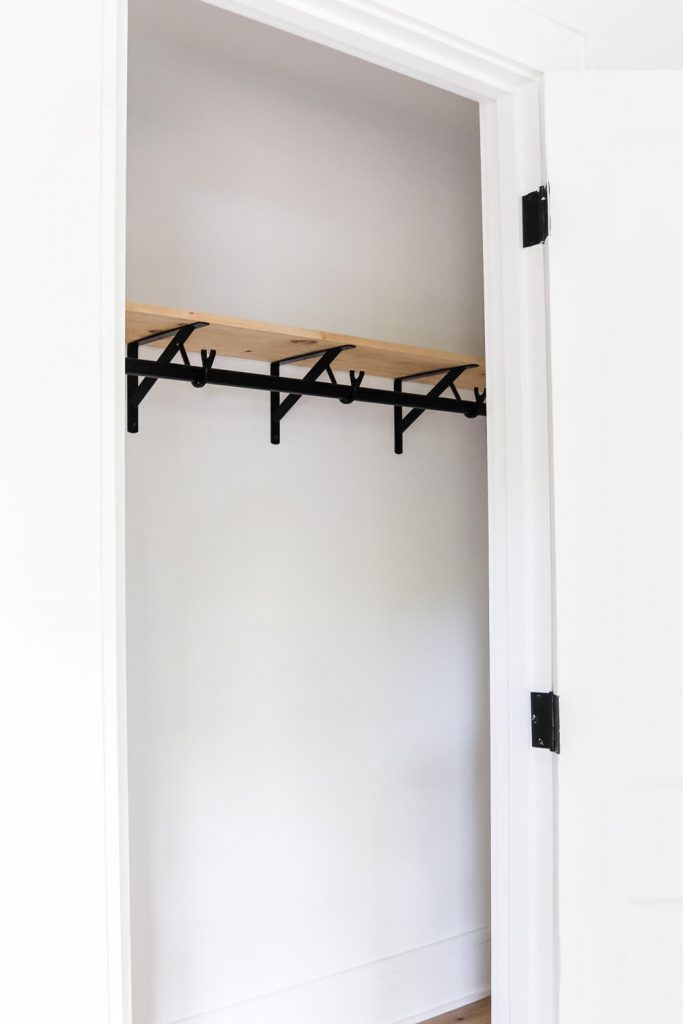
We were able to create and maximize the space in this primary closet and I love the simple, yet modern single shelf and matte black bar and shelf brackets.
ANYTHING but wire shelving, am I right?? It frustrates me to no end when you have a new construction home and walk in a closet or laundry room and see wire shelves. EW.
Trim Package
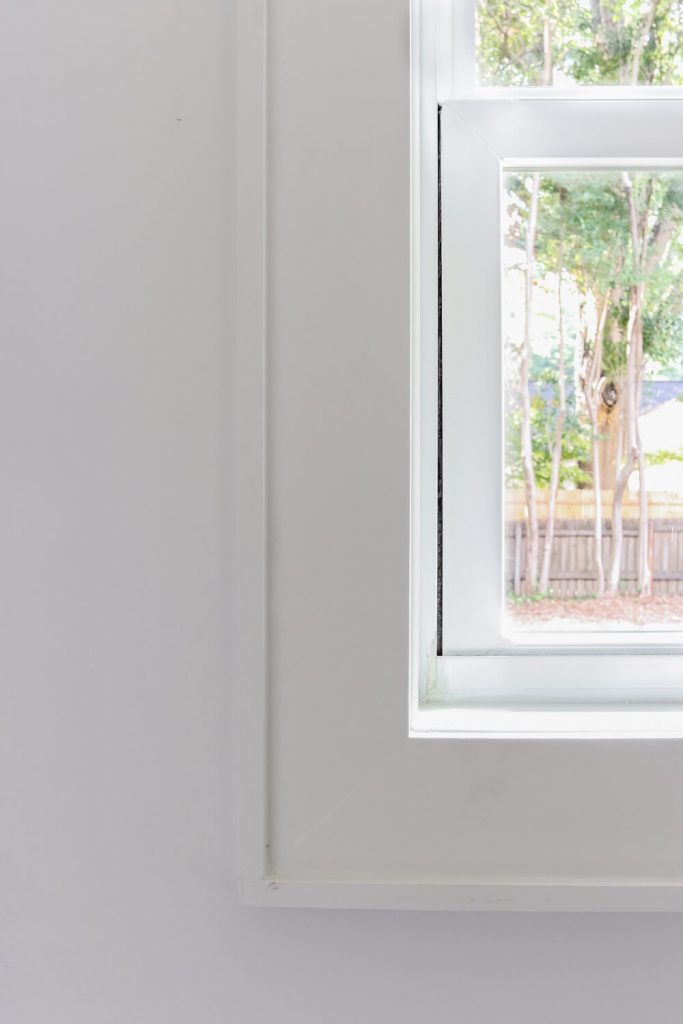

If we were to do our trim all over again (which we are NOT), we would do this picture frame molding. I absolutely love it. I’m happy with the craftsman style trim we have in our home, but if we were to change it, it would be this for sure.

How about these big ol’ baseboards, yeah?
I love the simplicity, but the little notch out in the top adds a bit of detail without feeling traditional.
Fireplace
Before:

During:

After:

Again, one of those things that I wasn’t sure how it would feel when it was all said and done, but I must say it’s a great focal piece and the perfect way to separate the kitchen and living space.

One more view of that kitchen for good measure.
Ahhhhhh.
I can not BELIEVE we did it. It was almost more of a labor of love than getting Collins here. I plan on talking to you guys about a full blown pros and cons of flipping our first house, a postmortem if you will, but I need some time to not think about it. Ha. Project exhaustion or whatever.
SOURCES FOR THE HOME:
This is something we have never done before so we are approaching this a little differently!
Many of the things in the house are from Amazon and you can find them by simply visiting my Amazon storefront here!

All you have to do is click on the photo of Beverly and you can see the list of the things we got from Amazon.
However, there are LOTS of things we didn’t get from Amazon, but I wanted to have a place where everything would live so I spent (an absurd amount of) time creating a PDF design guide!

You can get this almost 30 page design guide jam packed with every detail you need to know about this house, from paint colors to decor items for only $7!
Why did I do this? Why would I charge for this when so many others give away this information for free??
There was so much within the walls of this little home that I wanted a more permanent place for it to live. I also wanted to create a document that you could have on your computer or phone offline versus having to always come back to my site to get it, in case internet isn’t an option.
It’s all separated by room and every single item is listed by with the price and is linked so you can directly visit the proper place to view or purchase the item!
We have had a lot of people express interest in wanting us to help them flip a house because they’re not design minded and hiring us can cost you hundreds to thousands, depending on scope, but this little design guide can give you good guard rails to creating a space like this on your own for UNDER $10!
BUT!!!!
The people on my email list get first dibs on a discount code that will allow you to get this for only $4. But you’ll want to act fast because it’s only going to be the first 50 people to buy that get to use that code!
I’m so thankful you decided to follow along on our first house flip. We are like proud bird parents watching this lil’ birdie fly away. Here’s a sweet little video we had made to showcase the true before and after as well:


